Showing posts with label Imbolc. Show all posts

Monday, February 2, 2009

Monday Make A – Candles for Witches and Bride Bed for Witchlets

* Hand-Dipped Candles *
from ShadoeRose

Imbolc is often called Candlemas and is a festival of returning light. In some traditions of Witchcraft, candles are made on this date that will be used for ritual during the rest of the year. If you are interested in making your own hand-dipped candles, here are instructions: You need to obtain the following supplies:

  • 2 - 4 pounds of Paraffin Wax (the kind used in canning) or beeswax (which is usually expensive).
  • Candle wick (available at most hobby and craft stores)
  • oils and herbs
  • candle dye or crayons (but make sure they are the non-asbestos ones)
  • wax paper
  • a wooden spoon
  • a double broiler.

Begin by melting the wax in a double broiler. If you don't have one, you can use a large pot filled half full of water and a large coffee tin with the wax in it, sitting inside the pot. Heat the water to boiling first and cut up your wax so it will melt quickly. Once the water is boiling, turn the heat down and place the tin of wax inside of it. Keep the water hot enough to keep the wax melted but not so hot that the paraffin catches fire (which it has been known to do over high heat). While the wax to melting, stir with a wooden spoon (never use metal) & make sure it all is completely melted.
Also, while the wax is melting, mix the herbs (if more than one) in a small bowl. After the wax is completely melted and been checked, break the crayons up and put them into the wax. Keep stirring until all of the crayons have melted and the color is even and smooth, with no streaks. Keep in mind that the candle will be a shade or so lighter when dry. The more crayons – the deeper and richer the color, so experiment. Next, add the herbs to the wax. Stir with the wooden spoon until it is thoroughly mixed. Next, add 10 – 20 drops of essential oil to the wax until it smells strongly of the fragrance intended. Now your wax is ready. Start with a long piece of wick - twice the size of your desired candle length plus 3 inches (you will be making 2 candles at once). Bend the wick in the middle and hold it by the bend. Dip the wick into the wax and then lift back out. Getting started is the hardest because the wick will float on top of the wax until it has enough wax on it to weigh it down. Allow it to get completely cold between dippings when you first start. After your candle has started to take shape, you can speed up the process a little. I keep a pan of cool water nearby and dip the candles in the water after each dipping in the wax. While this speeds up the process a little, candle making is a slow process but very well worth the time you put into it. Keep dipping the candles and allowing them to cool & then dip again. When you have achieved the proper size, hang them to dry until the wax has set but the candles aren't too hard. Then roll them on the wax paper to smooth out the shape. Once the candle shape is too your liking, dip 1  or 2 more times to make sure your candle is smooth. Trim off any excess wax to make a bottom with a sharp knife. Cut the wick and hang your candles to dry.
You are done!

For the Witchlets

* Bride's Bed *
Copyright © 1997-99 Akasha, Herne and The Celtic Connection

Materials:

  • A Box
  • Colored Construction Paper
  • White, Yellow, Green, and Red Tissue Paper
  • White Flowers or Cotton Balls
  • Glue
  • Paint Brush
  • Crayons
  • Scissors
  • Glitter

This is a great little activity for the smaller children in the household, and they too can boast of helping with your altar decor. Paint one side of the box at a time with a bit of glue, not too thick, just enough to adhere green tissue paper. Cover the entire outside of the box with the green tissue paper. Cut a 2" wide strip of colored construction paper the length of the sheet (11"/14"). Let the child draw symbols and pictures that reminds them of Spring, the Goddess, brides, and weddings on the strip. Cut the white and yellow tissue paper into 2" diameter circles. While you are doing this, allow the child to draw pictures and symbols on the box with glue, and sprinkle with glitter. Place finger in the middle of a tissue square and draw up tissue around finger. Give a slight twist to crinkle paper into a flower shape. Remove finger and adhere to box and decorated construction paper strip with a dab of glue. Remember to leave about 1-1/2 inches on each end of strip. Attach these ends to the inside of the box with some glue. Let dry. Fill with white flowers or cotton balls. Tell story to children of how the Maiden is a Bride and that the Earth is her Bride's Bed.


Disclaimer: No one involved in this blog or its contents may be held responsible for any adverse reactions arising from following any of the instructions / recipes on this list. It is the reader's personal responsibility to exercise all precautions and use his or her own discretion if following any instructions or advice from this blog.

Friday, January 16, 2009

Friday Form A Circle – A Ritual for Two

* A Ritual for Two *
Adapted from J. Broch and Veronica MacLer's
Seasonal Dance

Preparation: Decorate the Circle with buds of flowers, if available. All element candles and other candles around the circle should be white. Ring the Circle with small white candles. Place the cauldron and three large white candles on the altar, ringed with new greenery. Each person should have a small, unlit white taper (3 inch) and a slip of paper with the words to the songs as he or she enters the circle. Because this is the festival when the ewes begin producing milk for the newborn lambs, use milk or a beverage like Irish Crème Liquor in the chalice.

The Ritual: Priestess invokes the elements. She moves deosil to the North (Earth) quarter and says:

"Spirits of the empty fields, waiting silently
under a blanket of snow, join us in greeting our lady bright."

The Priestess then moves to the East (Air) quarter and says:

"Spirits of the warming winds, blowing ever
stronger from the south, join us in greeting our lady bright."

The Priestess then moves to the South (Fire) quarter and says:

"Spirits of the shining flame, burning in the
infant Sun, join us in greeting our lady bright."

The Priestess moves to the West (Water) quarter and says:

"Spirits of the forest streams, breaking free
from your prison of ice, join us in greeting our lady bright."

Priestess returns to the altar and lights the first altar candle,, and says:

"Bridgit, lady of fire, of hearth and forge,
we welcome your return."

Priestess lights the second altar candle and says:

"Bride, lady of healing, of peace and joy,
we welcome your return."

Priestess lights the third altar candle and says:

"Bri'id, lady of inspiration, of vision and poetry,
we welcome your return."

Priestess raises hands in invocation and says:

"Bri'id returns from her winter sleep,
Warm Spring follows in her steps.
Soon the trees are green again,
Soon the flowers bloom.
We welcome back our Lady Bri'id
And every house makes room."

Companion says:

"Bri'id is come! Bri'id is welcome!"

The Priestess says:

"She lays aside her cloak of death
And wakes the world with her sweet breath."

Companion says:

"Bri'id is come! Bri'id is welcome!"

The Priestess says:

"And in the dark and frozen lands
We joyfully greet the newborn lambs."

Companion says:

"Bri'id is come! Bri'id is welcome!"

The Priestess says:

"And grateful for this sign of life
We gather here by candlelight."

Companion says:

"Bri'id is come! Bri'id is welcome!"

The Priestess says:

"And in the depths of winter's blight
We welcome Bri'id, our Lady Bright."

Companion says:

"Bri'id is come! Bri'id is welcome!"

The Priestess says:

"And all her bards will form a ring
And to their Lady Bri'id they sing:"

Companion says:

"Bri'id is come! Bri'id is welcome!"

The Priestess takes her candle and lights it from the first alter candle. She says:

"Fire of Bridgit, keep us warm through the
year and fill our home with love."

The Priestess holds her candle in the flame of the second altar candle. She says:

"Fire of Bride, burn away our illnesses
and fill our hearts with joy."

The Priestess holds her candle in the flame of the third altar candle. She says:

"Fire of Bri'id, shine as our guide
and fill our souls with song."

The Priestess turns to her companion in the circle and lights their candle from her own. She says:

"Bridgit of shining fire,
Lady of flickering flame,
Grant us our heart's desire,
Be with us, we call your name!"

The Priestess' companion hold her/his candle to hers. The companion says:

"Bridgit of shining fire,
Lady of flickering flame,
Grant us our heart's desire,
Be with us, we call your name!"

The companion then lights the candles around the circle, deosil while saying:

"Bri'id is come! Bri'id is welcome!"

When the companion returns to the alter the Priestess and her companion place their candles upon the altar. Together they repeat aloud the following:

"Bridgit of shining fire,
Grant us our heart's desire,
Be with us, we call your name!"

The Priestess takes up the chalice holding it skyward and says:

"Bridgit, Bride, Bri'id,
We welcome you into our home and our hearts.
Shine brightly for us, Lady of Fire,
That we may always feel your warmth."

The Priestess drinks from the chalice while her companion says:

"Bridgit of shining fire,
Lady of flickering flame,
Grant us our heart's desire,
Be with us, we call your name!"

The Priestess passes the chalice to her companion who drinks from it while the Priestess says:

"Bridgit of shining fire,
Lady of flickering flame,
Grant us our heart's desire,
Be with us, we call your name!"

Replace the chalice on the altar. The Priestess thanks the elements (moving widdershins beginning with the West) and says:

"Rejoice, oh spirits of the Stream:
Bri'id is come! You soon flow free!
Spirits of the infant Sun,
Rejoice! Your Lady Bri'id is come!
Spirits of the warming Air,
Rejoice! Your Lady Bri'id is here!
Rejoice oh spirits of the Earth!
Bri'id is here! You soon give birth!"

The Priestess returns to the altar and raises hands in benediction. She says:

"Lady Bri'id, we welcome you into the world once again!
Our Circle is open. Let the feasting begin!"

The companion lifts hands skyward and says:

"Bri'id is come! Bri'id is welcome!"

The Priestess and companion now partake of the feast, thus completing the ritual.

Blessed be!

Disclaimer: No one involved in this blog or its contents may be held responsible for any adverse reactions arising from following any of the instructions / recipes on this list. It is the reader's personal responsibility to exercise all precautions and use his or her own discretion if following any instructions or advice from this blog.

Thursday, January 15, 2009

Thursday This Is Your Spell – Candle Magic for Candlemas

* Candle Magic for Candlemas *
Talisman Winterhawk L.C.W. U.L.C. PhD.;
New Moon Pagan Wicca Witchcraft Occult Shop

As in ancient times before civilization, fire has always been used to promote a feeling of safety and warmth. When our forebears found that sticks in the fire would burn longer and brighter with the fat from a kill on it the first candles were born. Fire has always held a sacred position in the hearts of human kind. The use of candles whether from animal fat or bees wax was common by the 5th Century A.D.

In the Middle Ages they found that bark from trees, berries, and other dyes could be added to the fat or wax for coloration. Michelangelo used ores to give candles a blue color. The Catholic Church found that using red candles brought a higher level of energy to their High Mass. Our Wicca mothers used to add hemp or aloe to green candles for financial gain. With the advent of color psychology we now know why yellow would be a good color to stimulate the intellect. The full list of candle colors and their associations are as follows**:

White

  • Day – Monday
  • Planet – Moon
  • Purity, Truth, Sincerity, High Spiritual Ideals.

Gold

  • Day – Sunday
  • Planet - The Sun
  • Attraction, Persuasion, Charm, Confidence
  • Zodiac sign - Leo

Yellow

  • Day – Wednesday
  • Planet – Mercury
  • Stimulates the intellect. Anything to do with the mind or the brain
  • Business
  • Zodiac sign - Gemini

Green

  • Day – Friday
  • Planet – Venus
  • Vitality, Money, Balance,
  • Zodiac sign - Virgo and sometimes Taurus

Blue

  • Day – Thursday
  • Planet – Jupiter
  • Lighter... Tranquility, Understanding, Patience, Health
  • Darker... Impulsiveness, Depression, Changeability
  • Zodiac sign - Sagittarius The more teal or blue green belongs to Aquarius

Red

  • Day – Tuesday
  • Planet - Mars.
  • Lighter... Honor, Love, Morality
  • Mid rage... High levels of energy. Sexual energy.
  • Darker... Martial pursuits, hate, vengeance
  • Zodiac sign - Aries, darker red - Scorpio

Orange

  • Encouragement, Adaptability, Stimulation, Attraction.
  • Zodiac sign - Taurus

Purple

  • Day – Saturday
  • Planet – Saturn
  • Ambition, Power, Royalty
  • Darker... Restriction
  • Zodiac sign - Capricorn and Pisces. The more lavender belongs to Libra

Brown

  • Planet – Earth
  • Keeps thing as they are. The darker the color the more stagnant things become.

Black

  • Reversing, absorbing.

Silver / Gray

  • Cancellation, Neutrality,
  • More Silver... True Moon Psychic Powers.
  • Zodiac sign - Cancer

Why does Candle Magic Work?

As a candle burns it releases not only it's wax but it's color into the atmosphere. Whatever has been connected with the candle- as in the form of embedded energy - or written on the candle will transmigrate to a plane where it can do what you have intended and focused on it to do. A candle, like everything else used for a magical purpose, has to be consecrated. Use a general consecration for candles. They are creatures of Fire or of Art.

After consecration a candle must be dressed. This consists of anointing the candle with a special oil you have chosen for the purpose in mind. If you are drawing money to you I would suggest "Money Draw Oil". If you are healing a friend I would use "Health Oil”. The recipes for these and other oils and incense are in Herman Slater's  "Magickal Formulary"  or Scott Cunning ham's The Complete Book of Incense, Oils & Brews . Both are excellent.

To dress a candle correctly, liberally dab some oil on your finger. Touching the top of the candle say, "As Above". Touch the bottom and say, "So Below". Starting at the center touch the candle with more oil and move your finger to the top. Lift you finger off and place it again in the center and stroke the candle to the bottom. Do not move your finger in an up and down motion. This confuses the energies. Do this until the candle is coated. There are many other things you can do to embed a candle to your purpose. You can etch runes in it; a name on it; a purpose for it to perform.. Really the list is endless.

If you are doing a Solar spell consult the table for the proper hour, i.e., Sunday on a Sun hour. Consult the celestial guide to see if Mars and Saturn are not square, in opposition or conjunct to your purpose (unless you are trying to wreck havoc... watch that Karma) and that the Moon is not V/C. (void of course). For a spell that is to bring things to you the Moon needs to be "waxing" . For a repelling or banishing spell the Moon needs to be "waning".

Simple Spells, Mixed Spells, and Complex Spells

All the formulas given here have the same basic concepts. They are timing, intent and focus. For timing one would go to an astrological table (celestial guide), days and hours table. For focus refer to an herbal listing magical properties of each, (and possibly a gem or stone guide too), and last but not least an oil and/or incense formularies. (Not easy being a Witch is it?). Next decided whether the spell is going to need a Deity push (invoking the God and Goddess of your choice) or maybe just an elemental. Decided how much power this spell will need. (You wouldn't use a nuclear weapon to blow out a match but you do want to make sure that the spell will work.)

Simple Candle Spell

A simple candle spell consists of usually one candle of the necessary color, the special purpose oil and the matching incense. The spell will be performed on the correct time with all necessary symbols engraved on the candle. The candle is lit and allowed to burn all the way down at one time.

Mixed Candle Spells

This gets a little more complicated. There are 1 day spells as the one above, 3 day spells, 7 day spells, 14 and 21 day spells. I have yet to see a 28 day spell work. (Something about the Moon going full circle nullifying the spell...try it if you don't believe me..). 3day,7day,14day,and 21 day spells all have the same thing in common. They are started on the appropriate hour and last only one hour per day, that is to say... If we are doing a Solar spell we would start on a Sunday in the first hour (Sun hour for that day) and let the candle burn for only one hour. The next day we would light the candle in the first hour which would be a Moon hour on a Moon day. Lastly we would light the candle again on the first hour of the last day and that would be a Mars hour on a Mars day letting the candle burn all the way down on the third day.

A note here about putting out candles. do not blow out a candle***. Snuff it. Blowing out a candle finalizes the energy not to mention pissing off the Fire elemental. The only time you would blow out a magical candle is when you need and emergency STOP. There will be a backlash so be prepared. Regardless,  if the Moon is Void of Course on any of the other days you would still follow through just as long as when you started the spell the Moon was in a positive aspect to your intent.

Adding power is really a simple process. Before starting the spell write a chant that you will do upon lighting the candle each day. Once the process of the spell is underway (the candle is lit) one could write a petition to a Deity or an elemental using Dragon’s Blood Ink on parchment and burn it with the incense in the thurible. Further, one could use a sigil or seal and do the same thing. A sigil or seal can be placed under the candle and burned later after the spell is complete. The combinations are endless. Specific gems and stones can be placed around or near the candle to give it more power. Herbs can be embedded or sprinkled around the alter area for more potential too.

Complex Candle Spells

Complex candle spells require some space. The idea behind them is that you are building a world with candles and influencing that world by moving the candles around as you would have events move in the physical plane. When candles move toward something then that "thing" is getting closer to the person the spell is for. As the candles move away from a person then that "thing" is moving away in turn. In a complex spell there are many factors to contemplate. What color candles do I use for what? What different incenses and oils for what candle, and how many different sigils or seals are necessary? Before attempting the complex variety I would suggest reading all the information there is. These are the hardest to reverse. In general a candle spell looks like this:

  • Gather materials i.e.., what color candle, type oil and incense
  • Will I need inks?
  • Will I need to write on the candle?
  • Do I need to invoke the God and Goddess?
  • What is the Timing?
  • Cast a circle (not absolutely necessary but I do it).
  • Consecrate candle.
  • Write on candle (if desired).
  • Dress Candle
  • Write petition (if using one)
  • Add incense to thurible
  • Light Candle and meditate on intent
  • Burn petition in thurible ( if using one)
  • When the spell is complete if you are trying to invoke something cast the ashes to the wind and bury the excess wax in a secret place. If you are banishing something, throw the remains in the garbage.

To reverse a candle spell (this works for most other spells too)

  • Gather all melted wax, burned incense
  • recopy all sigils, seals and even the chant used in the spell you want to reverse or stop.  (Sometimes it isn't available due to throwing things to the wind or putting things in the garbage... get what you can!)
  • Gather up a gray candle.
  • You will need reversing oil and incense.

On a waning Moon duly cast a circle. Place the candle in the middle of the alter. Place all the items from the spell you want reverse or stop around the gray candle. Using your athame point at the gray candle and say:

"These things have I enmagicked
be will now cease to exist,
Go back the way you have begun,
cease now and desist.
With harm to none and no alarm
the energies dissipate,
Return all things now as they were,
I relinquish them to fate.
Nema, Nema, Nema."

(make banishing Earth Pentagram and light candle) (let burn all the way)

**I am including these colors as this is how the article was written, however, these associations may not be accurate for you. I truly believe much of the most effective magic is instinctual. For me the color associations are different, i.e. orange is for calm & peacefulness…Do what works for you and you will find it does – work for you that is *grin*

***additional note from dawtch – I disagree with this theory – that blowing out a candle “scatters” the spell intent, so they should be snuffed. I guess I am just too logical – in my brain, “snuffing” a candle will also “snuff” the energy and force it back into the candle rather than releasing it to the Universe. Conversely, when you “blow out” a candle, rather than “scattering” the energy as many claim, it seems to me, you are sending it on it’s way. This is something that I believe is “to each their own” much like the elemental/directional associations. I have always followed what I believe to be correct, and have not noticed any  diminishment of the effectiveness of my spells :)

winter58blank

Disclaimer: No one involved in this blog or its contents may be held responsible for any adverse reactions arising from following any of the instructions/recipes on this list. It is the reader's personal responsibility to exercise all precautions and use his or her own discretion if following any instructions or advice from this blog.

Tuesday, January 13, 2009

Tuesday Try A New Taste – Brigit’s Serpent: A Baking Meditation

* Brigit's Serpent: A Baking Meditation *
By Starhawk, Diane Baker and Anne Hill

Early on Brigit's morn
Shall the serpent come from the hole,
I will not harm the serpent,
Nor will the serpent harm me.

You will need:

  • 4 C flour
  • 3 T sugar
  • 1 t salt
  • 1 T double acting baking powder
  • 4 T butter or margarine at room temperature
  • 1 1/2 C milk (or soy milk)
  • jam
  • dried fruit (cranberries, apricots, raisins, currants or cherries)

Set aside six raisins or cranberries. Chop the remaining dried fruit until you have a cup and place it in a bowl. Cover it with water and let it soak. Put the flour, sugar, salt and baking powder into a sifter. As you sift them together, say thank you for the different kinds of grains and foods that grow out of the earth. Cut the butter into small pieces, add to dry ingredients and mix, using your fingers. Say think you for any of the extra good things in your life - the things that you don't need but that make life more fun or richer, like butter on bread. The butter should end up so well mixed in that you can hardly see it, the four just looks a bit grainer than before. Make a well in the center of the mixture. Think about the well you have inside you, and what you need right now to fill it up. Pour the milk into the well, remembering that the Goddess always does fill our well of love and joy and ideas, and thanking her. Mix everything together, kneading it with your hands just enough to make it stick together. Don't knead it too much or it will get tough. Divide the dough into three parts. On a floured pastry board, roll and pull one section of the dough until it makes a long thin cylinder. Then roll it lengthwise with a floured rolling pin until it is even longer and thinner. IF you don't have room on the board, use the table. The dough should end up about 1/4 inch thick or slightly less. Spread jam on the dough, not quite to the edge. Make a line of the dried fruit all along the jam-covered dough. Think about what in your life you would like to see bear fruit, what poems you'd like to write, what pictures you'd like to paint, what creative things you'd like to do, and ask Brigit's blessing. Fold the dough up and over the fruit, so that you make a long tube. Pinch the seams shut. Grease and oil a cookie sheet. Place the tube on the cookie sheet and form it into a loose, open spiral. Form one end into a triangular serpent's head and place raisins or cranberries for eyes. Repeat with the other two sections of dough. Bake at 450 degrees for 20 to 25 minutes. Baking temperature is important. If your oven is not reliable, take special care. Before serving, say:

Brigit, we offer you this serpent,
Made of grain, and milk,
With thanks for the food that feeds our bodies,
The fire that feeds our spirit,
And the waters of healing.

Break off pieces and feed each other, saying:

May Brigit's serpent bring you inspiration.

Monday, January 12, 2009

Monday Make A – The Chandler’s Craft

A chandler is the craft person who makes it possible to see at night. The craftsperson makes candles.

One of the nicest folk-customs still practiced in many countries, and especially by Witches in the British Isles and parts of the U.S., is to place a lighted candle in each and every window of the house (or at least the windows that faced the street), beginning at sundown on Candlemas Eve (February 1st), allowing them to continue burning until sunrise. Make sure that such candles are well seated against tipping and guarded from nearby curtains, etc. What a cheery sight it is on this cold, bleak and dreary night to see house after house with candle-lit windows! And, of course, if you are your Coven's chandler, or if you just happen to like making candles, Candlemas Day is the day for doing it. Some Covens hold candle-making parties and try to make and bless all the candles they'll be using for the whole year on this day.

~~ Candlemas: The Light Returns
By Mike Nichols; August 28, 2000

* The Chandler's Craft *
By Willow Ragan

Candles...

The very word evokes calm, mystery, warmth, romance and to those of us who walk in the ways of our ancestors: ceremony and ritual. Candles are as popular today as they were necessary as the only source of illumination in the not so distant past. In this day and age, candles are available in an ever-increasing variety of shapes, colors and scents. Scented, colored candles may work wonders in the bathroom while we soak in a hot tub, they may add a two-fold accent to a dinner-table setting or a casual get-together. Or they may give you a real headache if you're allergic to the synthetic perfumes used to give them their "unique" scents.
But what about ritual and magical purposes? Do you really want altar candles smelling of Gardenias and Sandalwood? Is cherry, blueberry or new mown hay the scent you had in mind when you carefully crafted your magical working? Has anyone been able to find good "old-fashioned" unscented, pillar or quarter candles recently? Well, maybe you have, but not in these parts and even in larger urban centers it's getting more and more difficult. From this frustration was born the idea for an article on the fine art of candle making. I realize many of you are probably too busy (as I often am) to make your own candles. Nevertheless you may find the odd afternoon or two that can be devoted to making up a stock of special or all-purpose candles.
Candle making can be approached as a form of ritual, no different than the crafting of an amulet or the making of an herbal charm. Making candles in consecrated space? Why not! They can be crafted on different days of the week or different phases of the moon and sun depending on their purpose. They can be made to specific color and scent combinations depending on the type of work of you'll be using them for. Powdered herbs can be added to the hot wax before pouring, small pieces of appropriate stone such quartz can be encrusted on the outer surface. The possibilities are endless.
In this article we'll be looking at the construction of the candles themselves. Information regarding the attributes of color, scent, herb and stones would turn a short article into a book far exceeding the size of this publication. At then end of the article you'll find a resource listing of candle making supply distributors, essential oils and bulk herb suppliers.

Candles

There are three types of candles: poured (molded), rolled and dipped. Depending on the method of fabrication, the wax can consist exclusively of beeswax, paraffin, or a mix of the two. Molded candles can have any shape or size, from multiple wicked pillars to delicate star or flower shapes suitable for floating in a bowl or goblet of water. They are usually made of pure paraffin or a mix of paraffin and beeswax. Rolled candles are made with sheets of beeswax that can be shaped into tapers, pillar and cones. Dipped candles come as tapers and can be made of pure beeswax, paraffin or a mix. With molded and dipped candles scent can be added to the molten wax, either through infusing herbs in the hot wax or by adding essential oils. Color can also be added to the hot wax. With rolled candles, scent is added to the wick. Beeswax sheets are available in many colors from their natural honey-beige through the usual white, black, reds, blues, greens and yellows. Some suppliers also carry metallic gold, silver and copper.

Wax

  • Beeswax - It takes an estimated 160,000 bees to make 60 pounds of honey that will yield about 1 pound of wax. When female worker bees excrete the wax, it is relatively white and odorless. The depth of its color and fragrance are determined by the use the wax was put to in the hive and the type of flower the bees were feeding from. Beeswax candles burn longer than paraffin candles, they are also dripless making them safer to use with ornate altar-cloths.

  • Paraffin - Paraffin, a petroleum product, revolutionized candle making in the 1860s. The addition of stearic acid, a purified form of tallow (hardened beef or sheep fat) makes the candles opaque and improves their burning quality. Acting as a hardening agent, 2 tbs. of stearic acid per pound of wax will produce a candle that drips less.


  • Blend of beeswax and paraffin - When making molded candles it is advisable to use a blend of beeswax and paraffin. According to Canadian candle maker William Nelson, the perfect candle is 51% beeswax, 10% stearic acid and 39% paraffin. Using more than 51% beeswax yields a candle that is tacky to the touch and difficult to unmold. Pure beeswax poured candles can be made using heatproof containers that serve the dual purpose of mold and candleholder. One could also experiment with cardboard or thick paper containers such as milk cartons and hot beverage paper cups, these could simply be peeled away once the candle was hardened. Any bumps or lines from these "molds" can be burnished away by gently rubbing it with a finger.

Additives

Adding scent to candles can be accomplished in several ways. The method used will vary depending on the type of candle and the form of scent being used.

  • Oil - Personally I prefer essential oils, it's what I recommend for adding scent to any magical or ritual preparation. To begin with, an oil created in living plant by the Mother is going to have a very different "feel" than synthetic chemicals mixed in a test-tube by someone whose sole objective is to make money. Secondly, I have yet to meet someone who has reacted badly to essential oils being used as air-borne scent (direct application of most undiluted essential oils to the skin is not recommended). Synthetic scents make me sneeze and give me a headache, included those is almost all of the most expensive perfumes. And finally synthetic candles scents are often simply too strong. With essential oils experimentation is necessary. The scent in the bottle may change when heated. To test, place a drop or two on a light. As the oil heats, its scent will diffuse, you'll then have a good idea of what the final product will be. Do not use "scented oils" such as perfumed oils or massage oils. The carrier base brings unnecessary additives to the wax and can affect the burning quality. Oils should be added to the hot wax just prior to pouring or dipping. The recommended amount is no more than 1/4 tsp. per pound of wax, or 1/2 fluid ounce per 5 pounds of wax. Stir it in well to distribute the oil throughout the wax so that it won't leave spots of discoloration as the wax hardens. Another way of adding oils to candles is to soak the wick in a small amount of oil before placing it in the mold or dipping. This is the method for adding scent to rolled candles.

  • Herbal Infusion - To add the scent and magical properties of herbs to candles, the herbs and flowers can be infused directly in the hot wax. Heat the wax to pouring temperature and add the herbs. Maintain this temperature for 45 minutes, then strain the wax. Depending on the herb used, the scent with this method may be much softer than with essential oils. Some plants such as Rosemary and Lavender have more aromatic oils and will give a stronger scent. Essential oils could be added after straining to increase the scent.

  • Dried Herbs - Adding crushed dried herbs to the wax before pouring (this can only be used for molded candles) will give a dappled appearance. Use loose dried herbs and matching essential oils for scent. The herbs will tend to drift towards the bottom of the candle.

  • Herbs and Oils - Herbs and oils can be used in combination, as most magical formula call for several plants, some could be added as oils, infused herbs and others as dried herbs.

Color

Color can be added by two means. By using special candle dyes available through candle supply distributor and craft shops, or by using good quality wax crayons. Candle dyes will come with instructions. Wax crayons give a more pastel shading. Use no more than 1/2 crayon per pound of wax. Grate the crayon and add it to the melted wax. Stir it well to evenly distribute the color, to judge what the final color will look like, drop a teaspoon of the melted wax into a saucepan of cold water. It will set immediately, the color of the sample will be slightly lighter and less opaque than the finished candle.
***Note: some brands of crayons have been found to have
asbestos in them. So research the brand that you will use for coloring to make sure that your candles are safe.

Equipment

Now that we've gone through the different substances used in candle making let's look at the equipment needed.

  • For molded and poured candles an electric deep-fat fryer or slow cooker can be used. These can often be found at garage sales or flea markets. They're great if you're going to be making large amounts of candles. They are also safer because the heating element is enclosed - wax that comes into contact with an open flame can flash into a fire. If you don't have, can't find or won't sacrifice (if you use it for candles you can't cook in it again) your cookware, a double boiler can be improvised by using a pot of water and a large coffee or juice can. If using a tin can, crimp one section of the edge to make a pouring lip. The nice thing about the fryer or cooker is that they often have thermometers and you can set them to the exact temperature you require.
  • In either case you'll need a candy thermometer to determine when the wax has reached pouring temperature. The smoothness of the finish (outside layer) is dependent on the temperature at pouring time.
  • A melting pitcher or something heat proof to pour the hot wax from, preferably stainless steel with a pouring lip and handle.
  • Potholder or oven mitt for handling the hot pitchers of wax. You could use a soup ladle in a pinch but it might get very messy, this is hot wax we're dealing with here.
  • Which is why you want to cover your "pouring/dipping" area with heavy-duty aluminum foil or wax paper.
  • Measuring spoons for oils, and stearic acid.
  • Wooden skewers or knitting needles for stirring the hot wax and poking the still melted candle (this prevents stir bubbles).
  • Scissors for cutting wicks.
  • Wick rod, a small rod that is strong enough to tie the wick to in mild setups - pencils, small skewers, strong wire rod.
  • Non-stick cooking spray wiped on the inside of the mold with a cloth, this helps the candle come out of the mold more easily.
  • A sharp knife or pizza cutter and smooth cutting surface for making rolled candles.
  • And of course, wax
  • stearic acid
  • wicking material
  • crayons or wax color
  • essential oils
  • herbs
  • molds.
  • There are other tools needed for special techniques such as appliqué, they'll be enumerated when those topics are covered.

Methods of Fabrication

  • How much wick - For molded and rolled candles, the wick should be at least 1/2 inch longer then the desired height of the candle. For dipped candles, see that section. Size 1/0 square braided wick will work in candles from 1/2 inch to 3 inches in diameter. Wick should be trimmed to 1/4 inch before burning.
  • Molded candles - Prepare each mold by wiping the inside with a cloth that has been sprayed with cooking spray. If you're using milk cartons or other peel-away mold, skip this step. Place the wicking securely in the mold, if you're using peel-away molds, coat the wicking with wax so that it dries straight, put a small dab of hot wax in the bottom of the "mold" and stick the wick to it. Then wrap the top end around a pencil or skewer laid across the top of the mold.
    The mold is now ready to receive the molten wax. Melt the wax (and stearic acid, crayon or color buds if desired) and stir. Bring it to the recommended pouring temperature. This will be between 160 F and 190 F depending on the wax, follow the directions that come with the wax you buy. When the wax has reached the correct temperature add scent and dried herbs if you like. Pour the wax into the molds to the desired height. As the wax cools, the top, which becomes the bottom of the candle if you're using a commercial mold, will shrink and develop a hollow. Using a knitting needle poke through the surface a few times to eliminate any air pockets, then fill the depression with more wax. You may need to do this several times, depending on the size of your candle, to level off the top. Leave the candle to cool and harden 12 to 24 hours before removing it from the mold.
  • Dipped candles - To make dipped candles, you need to use a pot that is a least 1 inch deeper than the desired length of the candles. You will also need to keep the wax topped off to the same level even as the candles increase in size. You also need to set up a drying rack before you begin making the candles. This "rack" can be made by laying a 2-3 inch wide piece of wood across the back of two chairs that are set a few feet apart. Put newspaper on the floor for the dripping wax to fall on. Any wax can be used, including pure beeswax. Wax temperature must remain constant - between 160 F and 170 F. If the wax is too hot, the previously accumulated wax will melt off, if it is too cold, the new layer will be lumpy.
    To make tapers, loop
    lengths of small-sized wicking about a foot longer than the desired length of the two candles. Each pair should be separated from other pairs by two to three inches along the edge of the board. Heat the wax as usual, and dip the wick in the wax to the depth of the desired length of candle for about five seconds. Placed the freshly dipped candles on the rack to set. Expect about 40 dips to produce a pair of candles a bit less than 1 inch wide across at the base.
  • Rolled Candles - The basic thing to know about rolling beeswax candles is that they seem to roll the best at normal room temperature (70 -80 F). If the wax is too cold, it will not "want" to roll and may crack. At the very least it will not stick to itself and your candle will be loose and not burn well. If the wax is too warm it will be too soft to roll, the pattern in the wax will get flattened out while rolling, and your finger will leave dents in the candle. The most important thing is to get good contact between the wax sheet and the wick. Therefore, the first wrap is the most critical.
    Press the wick into the wax on all sides. Spread you finger along the length of the candle for even rolling, the outer edge simply gets pressed into the candle. If you like, slightly heat the wax (or a butter knife) to help blend the outer edge into the candle. This will help keep the candle from unraveling. The sheets are generally 8 x 16 inches, wide and long enough to make tapers, pillars and cones.
  • Rolled Tapers - To make a pair of 8 inch tapers, use one sheet. Cut the sheet in half, place the wick along one edge. Roll it carefully, watching the edges to help you roll straight. For a tapered look, cut a small triangle off the top and start rolling from the longest end. Roll the same direction on the sheet so that the honeycomb pattern looks the same on both candles. To make 4 inch tapers, cut the sheet into 4 inch intervals, place wick along 4 inch edge and roll towards the opposite end. This is also the direction to roll in if you want to make single 12 or 16 inch tapers. One sheet will yield one 16 or one 12 and one 4 inch taper.
  • Rolled Pillars - To make a 4 inch pillar, approximately 2.5 inches in diameter requires two full sheets. Place the sheets on top of the other and  cut the sheets in half length-ways. Place the wick along the 4 inch edge of one of the 4 x 16 inch sheets and roll tightly and evenly around the wick. After rolling that entire sheet into a small pillar candle, place the next sheet end to the end of the sheet you've just rolled and continue rolling, making sure that the top edge remains aligned. Continue doing this till all four sheets have been rolled into your pillar candle. The uncut edges are usually more attractive than the freshly cut edges, so position the sheets so that the newly cut edge will be on the bottom. You can also make an 8 x 3 inch pillar by using three sheet of wax, just place the wick along one end and roll as with the other candles, then place the second sheet against the edge of the first sheet and roll. Repeat with the third sheet.
  • Rolled Cones - Spirals or cones happen because of a diagonal cut in a sheet of wax that is rolled against the straight edge of the sheet. Sheets can be placed end to end (with varying colors if desired) before the cut is made. This will yield two 8 inch spirals.

Special Techniques

Candles can be decorated by using and appliqué method. Pressed herbs and flowers or wax forms can be applied to candles. Appliqué is best suited to pillar candles, either round or square will do.

  • Wax Appliqué
    For this technique you'll need:
  • a "core" candle
  • a cookie cutter in the desired shape (star, flower, etc.) or sharp knife to carve with if you're using a symbol that isn't available in cookie cutter form
  • wax
  • color
  • scent
  • a baking pan to make the forms in
  • a bowl to hold warm water
  • a bowl to hold cold water
  • a small paintbrush
  • . If you're using an original design or runic form it's best to draw and cut a template on fairly rigid cardboard like poster-board or even using a file-folder.

    Prepare some colored wax for your appliqué, the amount of wax you prepare will depend on how many candles you are decorating and how many designs you use per candle. Pour 1/16( to 1/8( layer in the bottom of the baking pan. Allow it to cool until solid, but still warm. Press the cookie cutter into the wax or position your template and cut around it with a sharp knife. Remove the excess wax from around the shapes and allow them to cool completely. Removing them before they harden may distort the pattern. When they are completely cool remove the shapes from the pan and place them in a bowl of warm tap water until soft. When soft, remove from water and gently burnish the sides with your finger, this is to smooth out cut marks. Then immediately press against the core candle. Once the appliqué has taken the curvature of the candle, place it in cold water immediately. Repeat for all the appliqué. To attach the appliqué to the candle, apply tacky wax to the back of the appliqué and gently press to the candle. Repeat until complete.
  • Herbal appliqué 
    For this you'll need
  • a "core" candle
  • some hot wax
  • a small flat paintbrush
  • the herbs of your choice.
    Herbs and flowers used
    for this purpose need to be pressed and dried for a few days in a plant press or substitute, such a phone book. Arrange the pressed flowers and herbs on your work surface. Dab them with a bit of white glue or hot wax and immediately position them on the candle, pressing them onto the surface until the wax hardens or glue dries and they are held firmly in place. Coat the design with a thin layer of hot wax to hold the herbs in place permanently and to keep them from being scuffed and broken. There are various ways of doing this. The simplest way is to paint hot wax onto the candle's surface until the herbs are completely coated. To produce a smoother, flatter surface, you can dip the entire candle by its wick for a few seconds into melted wax up to its upper edge. Don't fill the wax container to the top because as you dip the candle it will displace its volume in wax and the level will rise; experiment to find out how much wax it takes and use a double boiler so that any overflow goes into the surrounding water.

There you have it, everything you may (or not) have ever wanted to know about candle making, so gather round a few of your friends, heat up some wax and enjoy the time honored craft of chandling.

Bibliography

Beeswax, History and Use. Roger A. Morse, Department of Entomology of Agriculture and Life Sciences, Cornell
Elementary, My Dear Chandler, Harrowsmith Country Life Reader, 1990, Camden House Pub.
Light up your Life, The Herb Companion, Oct/Nov 1994.
Lumina, on-line articles
WaxedOut Candles, on-line articles

Disclaimer: No one involved in this blog or its contents may be held responsible for any adverse reactions arising from following any of the instructions/recipes on this list. It is the reader's personal responsibility to exercise all precautions and use his or her own discretion if following any instructions or advice from this blog.
Sunday, January 11, 2009

Sunday Surprise – Imbolc – History, Origin & Ideas To Celebrate It

* History And Origins Of Imbolc *

Compiled By Meredith

Imbolc is one of the four greater Sabbats. Most traditions celebrate it on February 1st or 2nd, or on the first Full Moon in Aquarius. Other names for Imbolc, include; Brigantia (Day of Brigid, England), Candlearia (Mexican Craft), Feast of the Waxing Light (unknown), Disting-id (Teutonic), Candlemas (Christian, The Purification of the Virgin), St. Brigid's Day (Irish), Oimelc (ewe-milk, Celtic), Lupercus or Lupercalia (Feast of Pan, Roman/Strega), Fest of Lights (unknown), Antihestria (Greek, for the Festival of Flowers), and in our culture Groundhog Day. Some contributed meanings to the word Imbolc are "in the belly" or "in milk" and refers to the pregnancy and lactation of the ewes. This Sabbat is a celebration of Spring’s coming, and an end to the dark, cold days of Winter. In Celtic traditions, this is a holiday associated with Brigit, and has survived to this day in Ireland as St Bridget's Day. (Who was reputedly a midwife at the birth of Christ.)

The Romans dedicated the holiday to Venus and Pan, and the Greeks to Diana. In Norse traditions it was known as Disting-id and was a time for readying the Earth for planting, usually by sprinkling it with ashes, salt, and herbs. Candlemas rituals, are done by Catholics. Some of whom bring their candles for the coming year to the church to be blessed by a priest. Americans celebrate Groundhog's Day, where we find what our chances of an early spring will be.

Imbolc is traditionally a time of new beginnings, with planning, starting over, and making way for the new. In our modern lives the season has little impact on our daily life. But for our ancestors it would have been very different. In the northern hemisphere the ground is often still covered with snow at this point, and might have been too hard to till and prepare yet for spring planting. Our ancestors would have been living off of their stores from the previous harvest. This would have been a time of reflection and looking back, evaluating the stores they had put by, wondering if there would be enough, and at the resolutions that had been made. Being mostly house bound this was the best time for working on things for the house. Sitting in front of the cook fire while the stew simmered and working on a quilt, dipping candles from the tallow in the stores, making the small repairs which they would be too busy to perform during the growing season.

Traditions

Bread spread with butter was left on window sills on Imbolc Eve as a gift for the Lady, who was thought to visit each household that night, along with an ear of corn for her white cow. For those a bit more modern, try leaving buttered bread, an ear of corn, and a saucer of milk for Brigid on your doorstep. Reputedly butter and butter churns are sacred to Brigit. Sometimes the handle of the churn dash was turned upside-down and stuck into the ground with a cake placed on the flat top. In Scotland, on the last day of January, the ladies of the household would dress a corn dolly or a sheaf of oats (fertility) in woman's clothes and lay it in a basket or on a pile of reeds called a "Bride's Bed" next to the fireplace. A club, rod, or wand (often with a pine cone tip) was laid next to the doll. The women would then call out three times

"Bride is come! Bride is welcome!"

and discreetly withdraw so that the phallic "God" would impregnate the "Goddess." When the night was over, the women returned and checked the ashes of the fireplace or some type of sign. This could be the imprint of the club in the ashes, a footprint or any other mysterious symbol. If they find one, the coming year will be fruitful.

Decorations

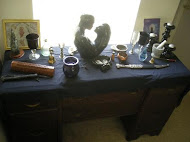
Decorate your Imbolc altar with Goddess images, lights, and candles, as this is a Sabbat associated with light. Set out a bowl of snow to slowly thaw and remind you of the approaching spring. Corn dolls are also appropriate, as are seeds and any sprigs of early-sprouting plants you can find. Imbolc is a festival of the home and hearth, and you can keep a fire in your fireplace all day or a small fire burning in a cauldron on your altar. Now is also a good time to buy new plants for your house.

Herbs

Snowdrop, Bay, Heather, First Flower of the Year.

Incense

Rosemary, Cinnamon, Wisteria Frankincense, Myrrh, Basil, Jasmine, Camphor, Lotus

Colors

Black, White, Pink, Green, Orange, Red.

Food

Dairy products, Salmon, Lamb, Pork, Sprouts, Eggs, Spicy foods such as Curries and peppers, onions, Chives, Spiced wines, Seeds, Herbal teas, and round foods.

Gemstones

Amethyst, garnet, onyx and turquoise

Spellwork

Catalyst spells, spells for beginnings, rejuvenation spells, purification spells, spells for good luck and for future endeavors, and initiatory rites.

Totem Animals

Wolves, Bears, Stags, Eagle, Raven, Groundhog

Poems

This medieval Anglo-Saxon plowing charm, recorded by Berger, was said by the farmer while cutting the first furrow.

Whole be thou Earth
Mother of men.
In the lap of God,
Be thou as-growing.
Be filled with fodder
For fare-need of men.

The farmer then took a loaf of bread, kneaded it with milk and holy water and laid it under the first furrow, saying:

Acre full fed,
Bring forth fodder for men!
Blossoming brightly,
Blessed become;
And the God who wrought the ground,
Grant us the gifts of growing,
That the corn, all the corn,
May come unto our need.
If Candlemas day be fair and bright,
Winter will have another flight
If Candlemas day be clouds and rain,
Winter is gone, and will not come again.

~E. Holden

* Ideas To Celebrate Imbolc *
Compiled By Meredith

Homemade Butter - In memory of our ancestors, and devoting your efforts to Brigit, you and your family can take turns making homemade butter. You will need;

  • 1/2 pint whipping cream
  • A jar with a tight-fitting lid.

Fill the jar 1/3 1/2 full of cream. Screw the lid on tightly and begin shaking the jar or rolling it back and forth on the floor or table top. The cream will begin to thicken and then small pieces of butter will begin to form. Continue shaking or rolling the jar until the butter forms a solid mass separate from the thin buttermilk. (It should take 10-15 minutes) You may add a dash of salt if you wish. The butter may be formed into different shapes using small cake molds or cookie cutters. Sample the butter on crackers or steamed vegetables Remember to keep any left-over butter refrigerated..

Spring Search - Take a hike with friends or family. Be on the lookout for signs of spring. Take souvenirs home, such as acorns, rocks, sticks etc. to make wands with.

Make a Priapic Wand - Take a stick about a foot long, and affix an acorn or pinecone to the tip with glue, wire, or twine. Use it in your Imbolc celebrations, and put it to "bed" with your corn doll.

Corn Dolls - Corn dolls, traditional portrayals of the Maiden, are common symbols of Imbolc. Dried stalks of wheat and grass can be found cheaply at craft stores. Tying a sheaf of wheat in three places, to represent the Triple Goddess, and wrapping it in a lace hanky can make simple corn dolls. To make a more complicated doll, bend the sheaf in half, tying it an inch or so below the bend. Make a small braid and poke it through just below the tie to serve as arms. Tie it again to mark the waist. Spread the ends of the sheaf out as a skirt, draping it over a cardboard cone if necessary to give it support. You can decorate it further as you wish, with a small straw hat, flowers or leaves, or just leave it plain.

Spring Cleaning - When you've completed your Spring-cleaning don't toss your old clothes and such, donate them to a local shelter for example. Go through your cupboards and donate canned foods or hold a canned food drive in your community.

Make Some Noise - Wake up early in the morning, take out all the noisemakers you can: pots and pans and whistles, go outside and joyfully make noise to wake up the sleeping Mother Earth. Bang away, wake her up! Little kids love a reason to let loose. Be nice to your neighbors though!

Planting rituals - You could also hold a ritual blessing over the seeds you plan to use in this year's garden.

Candle Making - Make and bless candles for the year to come. Children will enjoy helping you make candles. Wax can be purchased at your local craft store, in sheets or in blocks. Sheets are safest to use with small children, as no heat is involved. The sheets are simply rolled around long wicks. For older kids, melt the wax in a double boiler over low heat, or in a large empty can, with it's paper wrapping removed. Dip the wicks in one at a time, let the wax to harden before you dip again. You can use orange juice cans or milk cartons as molds. Wash them, then attach a length of wick to a pencil and allow it to hang inside the mold. Pour in the wax, and when it is cool and dry, remove the pencil and peel off the cardboard. Candles can be decorated, with whatever you would like, by pressing the objects into the wax while it is still slightly warm. You could also add scented oils, in small quantities, to your candles.

Fire - Clean your fireplace, sweeping clear all the ashes, then bless your hearth, and light a fire. Have an outdoor bonfire ritual, as a reminder of the warmth of spring to come. This would also be a good time to burn any Yule greens that still remain.

Bride's Crosses - In Ireland, people make Bride's Crosses woven of rushes or withies and in the shape of a three or four-armed cross. Or if you don't have these items, weave a Bride's cross out of wheat or barley purchased from the craft store or one out of the local grasses with dried seed heads. This custom may derive from an earlier fire ceremony in which this cross would have been ignited and cast into the winter skies of February to hasten the coming spring.

Dance the Spiral Dance! - Spiral dances are always fun. Grab hands and snake through the grass or the living room, wherever you do your ceremony. For those who cannot or do not want to do spiral dance, this is an excellent time to participate in the rhythm, by beating drums, shaking maracas and rolling rattles.

Disclaimer: No one involved in this blog or its contents may be held responsible for any adverse reactions arising from following any of the instructions/recipes on this list. It is the reader's personal responsibility to exercise all precautions and use his or her own discretion if following any instructions or advice from this blog.